So having basic knowledge of programming, I decided to give it a go.
My first assumption was that you would launch Visual Studio, Visual Basic Express or Visual C# Express to get started, but none of those were mentioned in the information I could find. You basically need to create a folder and minimum 2 files. First you create a folder in this location:
%USERPROFILE%\AppData\Local\Microsoft\Windows Sidebar\Gadgets
(Press [WindowsKey]+[R])

Here you create a new folder called myGadget.gadget where myGadget is replaced with the name of the gadget you want to create. I called my gadget "klokkuskipan" (meaning something simular to "TimeTracker"):
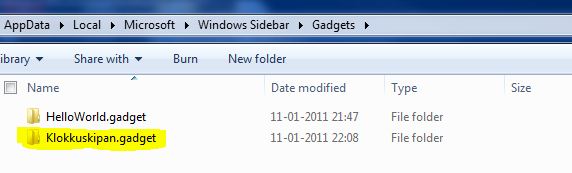
Now that I have the folder created, I need to create the two files:
Klokkuskipan.html
gadget.xml
Note that it's important for the manifest file to be called "gadget.xml" or else it won't get displayed in the "Add Gadget Dialog" which we will see later.
First I created the manifest file: gadget.xml
The contens of this file is:
<?xml version="1.0" encoding="utf-8" ?>
<gadget>
<name>Klokkuskipan</name>
<version>1.0.0.0</version>
<author name="Føroya Gjaldstova">
<info url="blog.isolveit.net" />
</author>
<copyright>© 2011</copyright>
<description>Klokkuskipan Sidebar Gadget</description>
<hosts>
<host name="sidebar">
<base type="HTML" apiVersion="1.0.0" src="Klokkuskipan.html" />
<permissions>Full</permissions>
<platform minPlatformVersion="1.0" />
</host>
</hosts>
</gadget>Next up is the html file. This file is the actual content displayed to the user. This filename must match the filename in the highlighted <base "src"> attribute shown above.
The content of the html file in my case was:
<html xmlns="http://www.w3.org/1999/xhtml">

    <head>

        <meta http-equiv="Content-Type" content="text/html; charset=Unicode" />

        <title>Klokkuskipan</title>

        <style type="text/css">

        body

        {

            margin: 0;

            width: 130px;

            height: 75px;

            font-family: verdana;

            font-weight: bold;

            font-size: 20px;

        }

        #gadgetContent

        {

            margin-top: 20px;

            width: 130px;

            vertical-align: middle;

            text-align: center;

            overflow: hidden;

        }

        </style>
        <script type="text/jscript" language="jscript">

            // Initialize the gadget.

            function init()

            {

                var oBackground = document.getElementById("imgBackground");

                oBackground.src = "url(images/background.png)";

            }


        </script>

    </head>

    <body onload="init()">

        <g:background id="imgBackground">

            <span id="gadgetContent">Klokkuskipanin</span>

        </g:background>

    </body>

</html>
All that is happening in the html file is, that I made a simple style to the gadget, and added a javascript to create a background image to it "on_load". This image resides in an images sub folder that I created. The reason I did this was that I have a black desktop background, which makes my gadget unreadable and ugly. So I made an image for that purpose.
Now after this you should already be able to see your gadget if you add it via the sidebar.
If you do not see the sidebar already check that you indeed run the required operating system, and that the sidebar is running. If it isn't running you can start it by pressing [WindowsKey]+[R], type "sidebar" into the "Open" box and then press [Enter].
Now that sidebar is running, right click on a gadget and select "Add gadget" from the menu:

Then, when the gadget selector shows, you should see your gadget there:

Now try to add this gadget to view your creation:

I'm going to call this the "End of part 1" stay tuned for "part 2".
No comments:
Post a Comment